A Pilot's Guide to Ground Icing
Module V - Anti-Icing Operations
How to keep it off
Section: Anti-Icing Application
Start This SectionAnti-Icing Application Anti-Icing Operations
Anti-icing fluids offer protection against active frost, cold-soak fuel effects and freezing precipitation for limited periods of time. The estimated time of protection or holdover time (HOT) starts with the beginning (not completion) of the final anti-icing application.
With thickened Type II, III & IV fluids, the goal of the anti-icing application is to lay down an appropriately thick, uniform layer of fluid (typically between 1 – 3 mm). As long as the fluid absorbs and melts the freez-ing precipitation, it has not failed.
Unthickened Type I fluids, however, readily flow off aircraft surfaces. Their goal is to raise the temperature of the aircraft skin. Type I fluids fail – often suddenly – when the temperature of the aircraft skin drops to the freezing point of the fluid on the wing.


Anti-Icing Application Anti-Icing Operations
Anti-icing fluids must be applied to a clean wing. That is, either the de-icing step has very recently been completed (within about 3 minutes), or you have pulled your clean aircraft from a hangar. Anti-icing can be applied as the second step in a Two-Step process (the first step being de-icing), or in a One-Step process, which accomplishes both de-icing and anti-icing at the same time.
Caution
Further Information
Two-Step De/Anti-Icing
The two-step process accomplishes de-icing and anti-icing as distinct steps. The first de-icing step removes the frozen contaminants, usually using Type I fluid. The second anti-icing step can use Type I, II, III or IV fluids. The HOT clock starts at the beginning of the second step, gaining quite a few minutes in HOT compared to a one-step process. There may also be an economic advantage in the two-step process in that expensive Type II or IV fluids are not used for the purposes of clearing ice and snow. This process is commonly used in North America.
If using Type I in snow conditions, you should use a two-step process. (In fact, this is a requirement for US and Canadian operators with an approved de-icing/anti-icing program.) The fluid must be heated to 60 – 80C (140 – 180F) at the nozzle and applied in sufficient quantities to provide for adequate heat transfer to aircraft surfaces during the second, anti-icing step.
The one-step method uses heated, diluted fluids to de-ice and anti-ice in one step.
Type II or IV fluids are commonly applied in this one-step manner in Europe, and Type I in North America. The HOT clock starts with the beginning of the appli-cation. Make sure there is time to complete the appli-cation, taxi, perform the pre-takeoff check(s) and takeoff before exceeding the HOT or fluid failure. Be especially vigilant if using Type I in active precipitation.
For longer holdover times, consider a two-step process, and/or applying undiluted Type II, III or IV fluids, if they are available and approved for your aircraft.

Anti-icing with Type IV fluid

AEA Recommendations for De-Icing / Anti-Icing of Aircraft on the Ground, 21st edition, September 2006
· Table 1 - Guidelines for the application of Type I fluid/water mixtures (minimum concentrations) as a function of OAT
· Table 2 - Guidelines for the application of Type II, Type III and Type IV fluid/water mixtures (minimum concentrations) as a function of OAT

Holdover Time (HOT) Guidelines, Winter 2006-2007, July 2006
· Table 6 – SAE Type I Deicing Fluid Application Procedures: Guidelines for the application of SAE Type I fluid mixtures at minimum concentrate for the prevailing outside air temperature (OAT).
· Table 7 – SAE Type II, Type III and Type IV Anti-icing Fluid Application Procedures: Guidelines for the application of SAE Type II, III and IV fluid mixtures (minimum concentrates in % by volume) as a function of outside air temperature (OAT).

· Table 1A - FAA Guidelines for the Application of SAE Type I Fluid Mixtures. Minimum Concentrations as a Function of Outside Air Temperature (OAT).
· Table 5 - FAA Guidelines for the Application of SAE Type II, Type III and Type IV Fluid Mixtures. Minimum Concentrations as a Function of Outside Air Temperature (OAT).
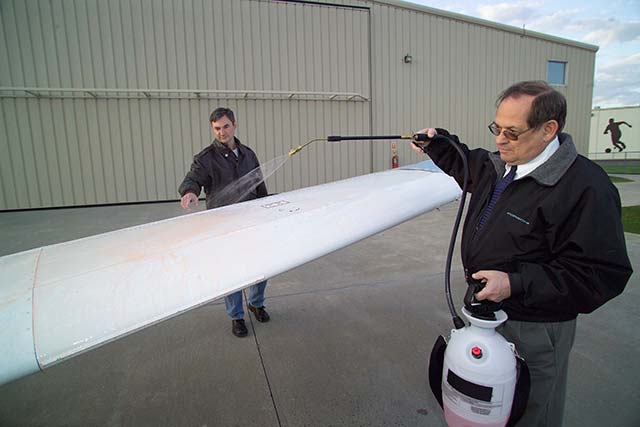
Why a hand-held sprayer is not acceptable for anti-icing
Type I fluids rely on imparting heat to the aircraft skin. Due to the low fluid flow rates, handheld sprayers are not capable of delivering the amount of heat to the aircraft skin required to achieve the holdover times.
Type II & IV fluids cannot be applied in sufficient quantity (and therefore thickness) in sufficient time (within three minutes after de-icing) using handheld sprayers. These sprayers can also shear the fluid excessively.
Examples of One-Step and Two-Step processes
Anti-Icing Application Anti-Icing Operations
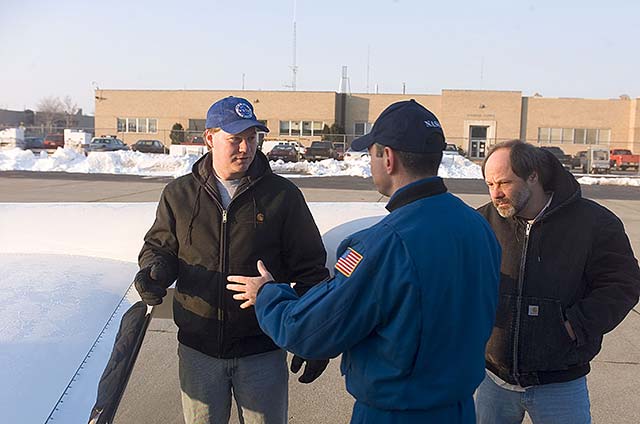
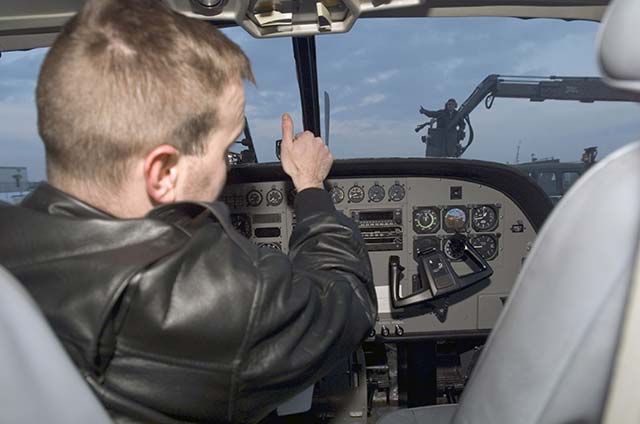
Once you've determined that your aircraft needs to be de-iced and/or anti-iced, the next step is to convey your request to the ground crew responsible for carrying out these steps.
If you are unfamiliar with the airport and deicing service provider (FBO), thoroughly brief the de/anti-icing process with the ground crew. You may want to call ahead to determine their capabilities and services. They can also tell you about the local procedures such as which de-icing pad or location you'll need to use.

Related Information
Tim Cattel - Questions to ask the de-icing service provider
Anti-Icing Application Anti-Icing Operations
In addition to the questions listed in Module IV: Fluid Application Procedures, you’ll also need to discuss and clearly determine all aspects specific to the anti-icing operation:
- One- or two-step process
- Type of fluid(s) to be used & fluid strength
- Aircraft areas you expect to be de/anti-iced and no spray zones, especially those unique to your aircraft
- Application start and stop locations on the aircraft
- Communicating the start time of final application
- Airport location to perform de/anti-icing procedure: ramp, pad, end of runway?
- The post-application check - who is responsible and how it will be conducted (visual, tactile)?
- Establish how you will you communicate: verbal and/or hand signals
Further Information
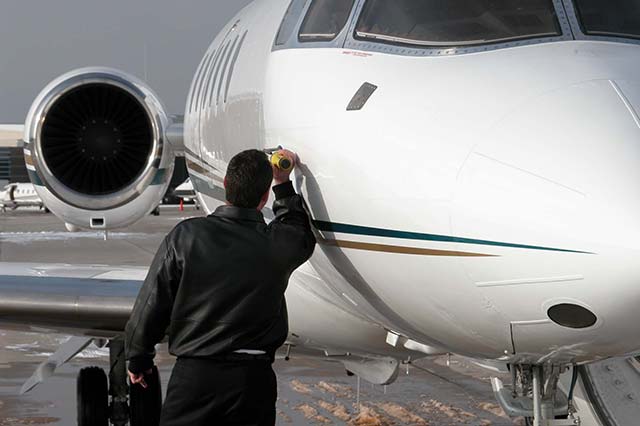
Consult your AFM or POH to determine where to begin the fluid application. Some suggest starting at the left wing, or wherever you look for your final go/ no-go check. This allows you to readily see whether or not the fluid first applied has begun to fail. Others suggest protecting the wings last, which allows the most critical surface – the wings – to be protected the longest. In any case, return to the point where you started.
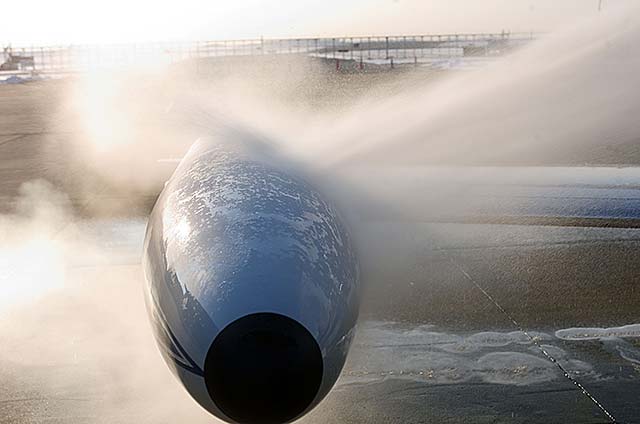
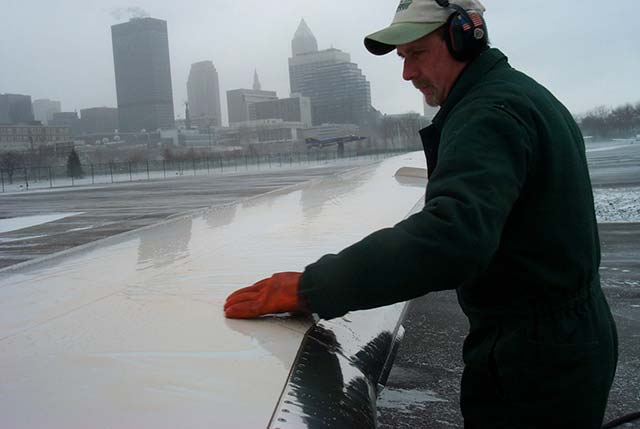
Type I deicing spray on Learjet tip tank


Anti-Icing Application Anti-Icing Operations
As the fluids are being applied, look for the following indications of an efficient, effective application:
- De-icing: look for rising steam to indicate that the fluid is hot and that the spray pattern is effectively removing/melting the contamination (see Module IV: Fluid Application Procedures)
- Anti-icing: look for a wider spray pattern that creates a coating of uniform thickness. This layer of fluid will absorb and melt the freezing precipitation. The fluid should be applied until it just starts to flow over the edges.
Caution
Further Information
Configure your aircraft properly (per your AFM or POH), and, if possible, align the nose into the prevailing wind. (See Module IV: Fluid Application Procedures)
It is strongly recommended to shoot the fluid the same way the air flows in flight – from the leading edge (not trailing edge), sweeping from front to back of the wing and tail, and from top to bottom of the fuselage. That way, the fluid is less likely to get trapped in aerodynamically quiet areas, such as control surface gaps.
For aircraft with non-powered controls, avoid flooding the horizontal stabilizer with excessive amounts of Type II or IV fluids. There have been instances where fluid has migrated to the underside of the stabilizer and interfered with the downward force generated by the horizontal stabilizer, or with the movement of the elevator. As a result the aircraft did not rotate properly.
References:
· SAE ARP 4737(G) section 6.1.2
· AEA’s Recommendations, sections 3.9.1 and 3.9.2 for
additional tips on how to remove frost, snow or ice.


Anti-Icing Application Anti-Icing Operations
If the inspection reveals any frozen contamination on the critical surfaces, the aircraft must be de-iced again.
Caution
Further Information
It should be noted that most regulatory agencies allow some aircraft to take-off with a limited amount of frost adhering to specified areas on the aircraft in accordance with manufacturer instructions. Such areas may be the underside of the wing in the area of the fuel tanks, or the upper surface of the fuselage with forward-mounted engines. If your aircraft has this exception, and you chose to takeoff with a layer of frost in accordance with this exception, make sure it is of uniform thickness and without ridges.
Related Information
MONTREAL, QUEBEC – CANADA
JANUARYU 21, 1995
B-747
The Royal Air Maroc Boeing 747-400 was parked in the de-icing centre of Montreal (Mirabel) International Airport, Quebec. The aircraft was being prepared for a scheduled flight from Mirabel to Casablanca, Morocco, with a stop at New York, New York. The four engines were running during the de-icing operation. The crew heard "dégivrage terminé" (de-icing completed), and the captain asked the co-pilot to inform the apron controller that the aircraft was ready to taxi. Taxi instructions were issued. The aircraft started to move forward and overturned the two de-icing vehicles that were still in front of the aircraft's horizontal stabilizers. The two vehicle drivers sustained minor injuries; the three occupants of the cherry-pickers received fatal injuries.
The Board determined that the flight crew started to taxi the aircraft before its perimeter was clear, following confusion in the radio communications. The following factors contributed to the accident: a lack of de-icing procedures within Royal Air Maroc; non-compliance with procedures on the part of the Canadian Airlines International Ltd. de-icing crew; inadequate or inappropriate communications equipment; incomplete training of Snowman 1 (the chief de-icing attendant); a regulatory framework less demanding of foreign air carriers than of Canadian carriers; a lack of operational supervision; and a lack of adherence to radio protocol.